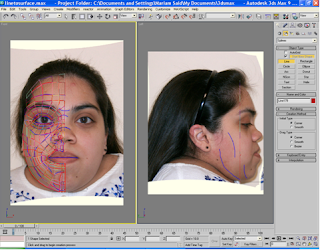
Once the reference plates were set I then had to create a mesh.I did this by drawing all the topology lines. When I selected the line tool I set the Creation method ‘Initial & Drag’ options to ‘Corner’ this will create hard corners. Draw on the lines, Click ‘Yes’ to close the Spline.

After I drew all the lines, I had to attach them all. I selected the first quad and converted in to an editable poly, within that modifier I attached all the other lines, and this created a mesh.
 Once creating the mesh I had to edit it, as there were gaps in the mesh. I did this by selecting the object then clicking the editable poly modifier. Within this clicked on vertex and the edit vertices, in this panel I used the option weld. This fixed all of the problems in the mesh.
Once the mesh was sorted I had to start the actual modelling process. Before starting this I had to make sure both images were lined up, I had frozen the images before this meant that I couldn’t select the images and move them.
This process included moving all of the lines across as the mesh/surface is flat. I first had to select the first row of lines starting from the right and make this a straight clean line. In the edit poly modifier I used the make planar option; I used the ‘x’ axis. Once I had the straight line, I selected it and using the left viewport I dragged it across to the end of the face.


No comments:
Post a Comment